
If your lawn still looks dull and patchy even with regular watering or fertiliser application, that is likely caused by excess thatch.
Thatch is that dense and tangled layer of dead grass, roots, and clippings that builds up between your grass and the soil. A little bit is fine, but when it gets too thick and blocks nutrients from reaching the grass roots, lawn scarification becomes necessary.
Lawn scarification means removing excess thatch so your grass can absorb nutrients and grow stronger. In this guide, we’ll show you why thatch builds up, how to scarify, and the tools you will need. Plus, we’ll weigh the pros and cons of DIY-ing and calling in an expert, so you can make the best choice for your lawn and finances.
5 Causes of Thatch Buildup
Knowing why thatch builds up in your lawn is your first defence against it. Most of the time, thatch becomes too thick due to these lawn care habits:
Pesticide Overuse
Applying too many weedkillers kills all the good microbes in the soil that naturally break down thatch.
You might be overusing weedkillers if you spray too frequently, apply too much at once, or use them as a preventive measure when there’s no pest problem.
To keep your lawn healthy, stick to the pesticide’s application instructions and spot-treat rather than spraying your entire lawn.
Poor Soil Quality
Low-quality or compacted soil struggles to support the tiny organisms that help decompose organic matter. When that natural recycling system breaks down, thatch is what’s left behind.
Clay-heavy or sandy soil is prone to this problem since it doesn’t hold the right balance of air, moisture, and nutrients.
You can reverse soil compaction through lawn aeration. It's an effective technique that improves the air exchange and gives the roots a direct path to water and nutrients.

Infrequent Mowing
Infrequent mowing allows the turf to grow tall, resulting in big clippings when you finally mow your lawn. These big clippings clump together, forming a perfect base for thatch.
Regular mowing produces small clippings that break down quickly and feed the lawn. That’s why experts suggest mowing your lawn every 7–10 days.
Watering Too Often
Daily deep watering might feel like a good lawn care routine, but it is a recipe for thatch. Constant moisture drives out oxygen and suffocates the microbes that eat thatch.
As a result, thatch builds up faster. Instead of watering deeply every day, give your lawn 25- 40 mm of water per week and see how much healthier it will be.
Overfertilising
Feeding your lawn too often sounds like a good idea until the grass starts growing faster than it can sustain itself. This rapid growth produces more roots, stems, and debris, much of which dies off quickly and turns into thatch.
Stick to a balanced fertilising schedule that matches your grass type and season to avoid overloading your lawn.

Common Signs of Excess Thatch
Here are visible signs that you might have excess thatch in your lawn:
- The lawn feels bouncy or springy when you walk on it.
- Water refuses to soak into the soil and starts forming puddles.
- The lawn is faded or straw-like, no matter how much you water or fertilise.
- Roots struggle to grow deep, leaving your grass weak and easily stressed by heat or drought.
- You notice uneven growth or bare areas.
Catching these signs early makes scarification easier and helps your lawn bounce back faster.
When Should You Scarify Your Lawn?
Scarify your lawn when the thatch layer is thicker than 12mm. That’s the point where air, water, and nutrients stop reaching the soil effectively.
However, the timing depends on your local climate. Scarify your lawn in the autumn, September or early October. The ground is warm and damp, ready for scarification. Another great window is early spring (April), when the soil warms up. Just avoid doing it during mid-summer droughts.
When it comes to frequency, scarifying your lawn every one to three years is a safe practice. Doing it too often can stress the grass instead of helping it grow.
Essential Tools for Lawn Scarification
The right lawn care tools make scarification easier and help you avoid damaging your lawn.
For small lawns or light thatch buildup, manual tools do the job just fine. A scarifying rake with sharp tines lets you pull up and loosen thatch by hand, while a hollow-tine aerator removes small plugs of soil to improve air and water flow.

You can also use a manual lawn scarifier, a push tool with metal blades that slice through the thatch layer, and a leaf rake to gather the loosened debris afterwards.
For large lawns or heavier thatch, power tools make things faster and easier. A power scarifier, also known as a vertical mower, uses spinning blades to cut through and lift thick thatch quickly. A tow-behind scarifier attaches to a ride-on mower, covering big lawns with minimal effort.
If you’re working on a smaller space, an electric scarifier is suitable as it is lightweight and easy to use. Meanwhile, a petrol-powered scarifier offers more strength and depth for compacted or overgrown lawns.
How to Scarify a Lawn: Step-by-Step Guide
With the right approach, you can restore your lawn’s health in just a few hours. Follow these steps to DIY:
Step 1: Prep the Lawn
Start by mowing your grass shorter than usual—about 10mm lower than its normal height. It helps the scarifier reach the thatch layer more effectively.
After mowing, rake up loose clippings or debris, then water the lawn lightly a day before to soften the soil without making it muddy.
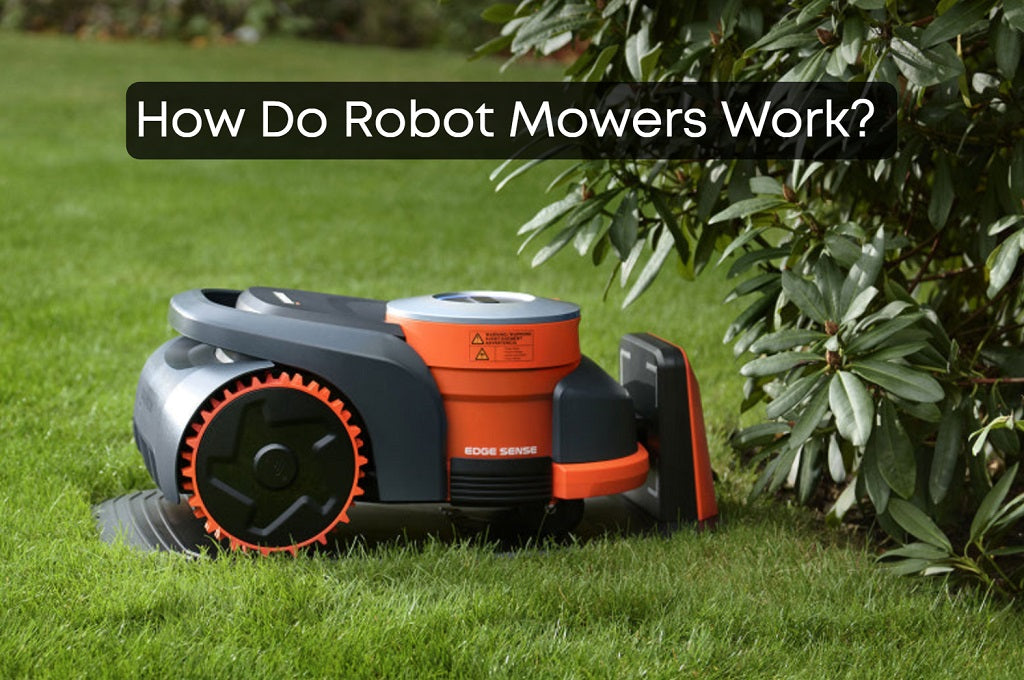
For hands-free lawn mowing, use a robot lawn mower from Navimow and save hours of manual labour each week. If you have a small lawn up to 800 m², you can go with the Navimow i2 AWD. For large lawns up to 5,000 m², Navimow X4 is the best choice.
Step 2: Set Up the Scarifier
Your settings will depend on your grass type, thatch thickness, and the machine model you’re using. Always check the user manual first.
As a general rule, set the blades so they just touch the soil surface. The blades should go deep enough to pull up thatch but not so deep that they tear up roots or soil.

Step 3: Scarify in One Direction
Move slowly across the lawn, overlapping your passes by a few inches to ensure full coverage. Start with a small test patch first. This lets you confirm the settings are right and helps prevent damage if the blades are cutting too deeply.
Step 4: Do a Second Pass
If your first run still leaves behind thick patches of thatch, go over the lawn again at a crisscross angle to the first pass. This helps lift any stubborn layers the blades missed and opens the soil for better air and water flow. Just be gentle so that you don’t scalp the grass.
Step 5: Rake and Remove Debris
You’ll be left with a huge amount of loose, dead material after lawn scarification. Rake it up thoroughly.
Leaving it there will block sunlight and suffocate new grass. You can compost the thatch if you haven’t used a pesticide. Otherwise, bag it and dispose of it with your lawn waste. A clean surface helps your grass recover faster and grow thicker.

Should You DIY or Hire a Lawn Care Professional?
The choice between scarifying your lawn yourself and hiring a professional hinges on cost and convenience.
Doing it yourself costs less if you own the needed tools or find a cheap rental company. It also gives you full control over the timing and technique and lets you acquire basic lawn care skills. However, it can be time-consuming, especially if you have a big lawn.
Hiring a lawn care professional is ideal if you want to save time. These experts use commercial-grade equipment that not only speeds up the lawn scarification process but also guarantees a flawless finish.
Plus, they have the expertise and experience to handle various lawn care tasks, eliminating the risk of on-the-job property damage. Professional lawn scarification costs anywhere from £80-£250, depending on the lawn size.
If you have a small, even lawn and the basic tools, going the DIY route saves you money. But for large, sloped lawns or thick thatch, hiring a pro is worth every quid for the time and effort it saves.

Keep Your Lawn Healthy All Year
A healthy lawn is the result of steady care and attention. Mow regularly, water deeply but infrequently, and consider annual aeration. Keep an eye on that thatch layer each season, and you’ll prevent it from becoming a problem again.
If you enjoy a hands-on approach but want to save time, get a Navimow robot lawn mower. It lets you schedule mowing tasks, view real-time progress, and receive live updates on your device. So, you can get a perfectly trimmed lawn without spending weekends pushing a mower around.

FAQ About Lawn Scarification
Can scarification hurt my lawn?
Scarification can damage your lawn if you do it aggressively or at the wrong time (like in the peak of summer heat). It’s a stressful process for the grass, so always follow up with water and a light fertiliser to help your lawn recover.
Can I scarify and aerate on the same day?
Yes, you can scarify and aerate on the same day to improve the soil quality. Scarify first to clear the barrier, and then aerate to give your lawn a massive boost of oxygen and moisture.
Is power raking the same as scarification?
No, power raking and lawn scarification are not the same. Power raking digs deeper into the soil to remove thick thatch. For most homeowners dealing with thinner layers of thatch, scarification is sufficient.